The Divi FilterGrid plugin has many ways you can modify the output of each grid item using filters. Each element (thumbnail, title, meta, etc.) has its own filter that you can read more about here. There is also a custom content filter available that will allow you to add content at the bottom of each grid item.
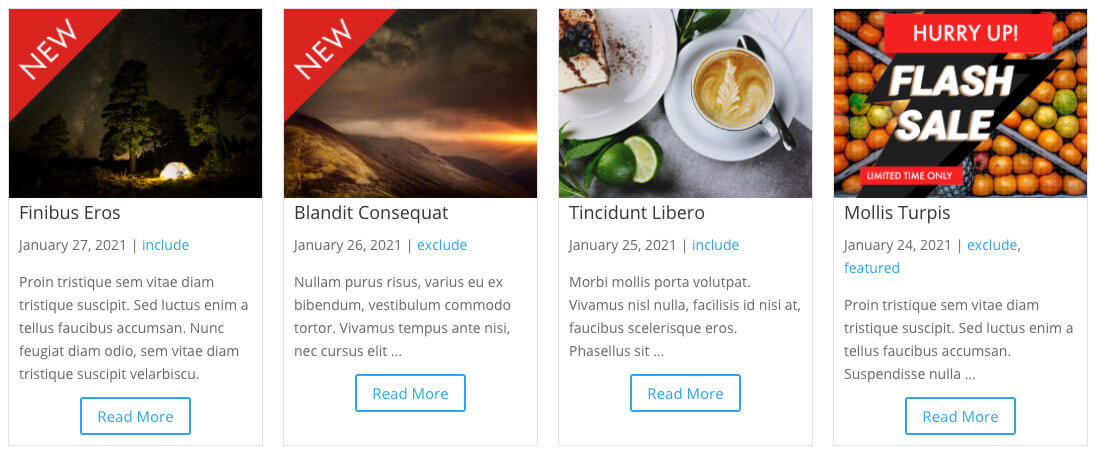
In this tutorial I’m going to show you how to use the thumbnail filter to display a banner on top of the featured image. We’re actually going to display two different banners. One banner will display if the post’s published date is within the last three days. Another banner will display only if the post has a specific tag (featured). Here’s what the end result will look like:
Below is the code you would copy and paste into your child theme’s functions.php file:
I did my best to comment each part of the code to make it clear what we are doing. In line 3 we are checking if the Divi FilterGrid module has class ‘dfg-thumbnail-filter’. If the module does not have this class, we are skipping lines 4-33 and simply returning the featured image. If the module does have this class, we then add additional checks to decide if either of the featured image banners should be displayed. * You can add the module class by going to the module’s Advanced tab -> CSS ID & Classes -> CSS Class input.
In lines 5-9 we are simply assigning our banners a URL and saving that URL to a variable, which we’ll then add to the img src further down in the code. You’ll want to modify the URLs to match the location of your banner images. We could have avoided this step by simply adding the URLs directly to the img src value. I am assigning them to variables to make it easier to modify this function to fit your needs. For example, you could get the banner URLs from a custom field instead of hard coding them.
In line 12 we are checking if the post has the ‘featured’ post_tag. If yes, our $featured_post variable will have a value of “true”. If no, it will have a value of “false”. We’ll check this value further down in the code on line 26.
In lines 15-21 we are getting the post’s published date in Unix timestamp format and saving it to the $published_date variable. Then we are using PHP’s strtotime() function to check if the published date is within the last 3 days of today’s date. If yes, we are setting the $within_three variable value to “true”. If no, it will have a value of “false”. We’ll check this value further down in the code on line 23. * You can find more examples of the strtotime() function on the documentation page on php.net.
Finally in lines 24-32 we are using a PHP if else statement to check the values of our $featured_post and $within_three variables to display the correct banner. If the $within_three variable is true, our post was published within the last 3 days and the new banner will be displayed. If the $within_three variable is false but the $featured_post variable is true, the post has the featured tag and the featured banner will be displayed. If neither are true, our featured image will be displayed without any banners.
Keep in mind that if else statements run in order from top to bottom. As soon as it finds a true statement, it will execute the code inside the braces { } immediately following the true statement and will stop checking the other statements.
In our case if a post has been published within the last 3 days, it will display the new banner even if the post has the ‘featured’ post_tag. If we wanted the featured banner to have precedence, we would want to reverse the if statements so that the value of the $featured_post is checked first.
There are many ways you could modify this to suit your needs. In the example above, I am adding inline style to each banner image to position the banners directly on top of the featured images. But I am also adding a unique class. You could move the inline CSS to your child theme’s stylesheet and apply it to the class. Also as mentioned earlier, you could dynamically set the banner images using custom fields. For example, to replace the $new_image_banner variable with a URL from a custom field you would change it to this:
$new_image_banner = get_post_meta( $post_id, 'my_custom_image', true );
You would just need to replace ‘my_custom_image’ with the name of your custom field that contains the URL to your banner image.


This is cool! Much better than installing another plugin. Thx
Thanks! Glad you liked it Andreas.
Thanks for sharing, will be adding it today!
Hope it turned out Marcus!
Can you do the same using Portfolio Posts Pro?
Hi Patrick! That plugin does not have the same customization hooks as Divi FilterGrid. You might be able to do something using the custom content filter, but it would require more effort and probably absolute positioning:
https://diviplugins.com/documentation/portfolio-posts-pro/custom-content/